
Let's be honest. I really like to sew, but...the whole two-students-in-the-house thing doesn't leave a whole lot of room in the budget (and yes, we actually have a budget) for crafting expenses, so sometimes most times, I have to get creative.
I like to grab my coupons and head to the clearance section of any store. (I really like Kohls because they will let you use coupons on their clearance.) So, when I found this little beauty, I couldn't resist the adorable fabric and the price. (Especially because it was another 30% off the clearance price listed.) Nice find right?

After some pattern creating, cutting, and sewing, I turned this inexpensive little beauty (along with some pink scrap knit that I had) into these two onsies:

They look a lot like the white store bought onsie in the picture, don't they? They even have the overlapping shoulder feature to make them easier to put on.

The one thing they are missing...the snaps at the bottom. (I 'm not quite that far yet).

Wouldn't it be cool to make your little one a shirt out of your old favorite shirt?
Want to make your own?
You want to make sure that you have some good fabric. The pink onsie was made of knit, and the blue flower onsie was made of cotton and spandex. The knit was easiest to work with because it was a little less stretchy than the cotton/spandex blend. Stretchy fabrics can be difficult to work with, but with a little patience, and a few tips that can be found in this tutorial, I think you will love the finished product.
The pattern I created is for 3-6 month (maybe a little larger). If you would like a smaller onsie, you might increase your hem length. If you would like a larger size, just use my pattern to create one that is a little bigger. It may be helpful to use an existing onsie to guide you. In order to print the pattern, save the images below, put them into a word processer and make sure they are the same size as an 8.5 x 11 piece of paper. (Please don't use these patterns for the making of anything that you will sell. They are for personal use or gifts only.)


First, print two copies of the pattern and tape them together where indicated. Cut along the blue and bold black lines on one of the copies and the red and bold black lines on the other copy. This will give you the front and back pieces. Then cut out the sleeve piece.
Place the back pattern piece on your fabric, being sure to put the "place on fold" side of the pattern on a fold. You are not going to cut this side of the fabric.

It helps to use a fabric pen (or if you are lazy like me, a normal pen) to trace the pattern. You can also pin the pattern in place using sewing pins. Cut around the pattern (but don't cut along the "fold" side). When you are finished, you should have a back piece that looks like this:

Now do the same thing with the front piece pattern. Place it on the fold:

And cut along the edges. When you are finished, your front piece should look like this:

Now cut out the sleeves. Place the edge that reads "place on fold" on the fold. Cut around the other three edges of the pattern. Do this twice. The sleeves should look like this when you are finished.

Make sure that you make the tick marks on the front and back bodice pieces near the top on both pieces and on both shoulders of the pattern (see the pattern for more instruction). In the end, you will have four tick marks.

You will also need to cut out the ribbing for the onsie. FYI: ribbing can also be purchased (this is the easiest way to get ribbing, but it is also more expensive than using fabric you already have to make your own.) You will need strips of fabric that are:
- 31 inches x 2 inches
- 5 inches x 2 inches
- Two pieces that are 14 inches x 1.25 inches
Since I am repurposing a shirt, I will unpick some of the ribbing that is already on the shirt to use for my two pieces of ribbing that are 14 inches x 1.25 inches.

I also do not have pieces of fabric that are long enough to make a continuous strip that is 31 inches x 2 inches. So, I will piece two together.
Here is a little secret for piecing strips of fabric together to avoid a lot of bulk from the seam all in one place.
First, cut your strips of fabric. Then place them perpendicular to each other (with right sides together) like this:

Sew across the fabric diagonally. Make sure you sew in this direction, or your strip won't open up to be continuous.

Trim the seam:

Open your strip and iron the seam open like this:

Now, to make your ribbing, iron the strip in half:

Unfold the strip and iron each side into the middle to meet at the folded line you just created:

Now iron the strip in half again:

Your finished ribbing should look like this. Use this method for any other pieces of ribbing that you need to make.

Now, pin the thin piece of ribbing into place along the top of the front and back bodice piece. Since my fabric is patterned and hard to see, I took a picture of a pink piece of paper (the ribbing) and used a white piece of paper (the bodice piece) as an example. You are going to put the ribbing onto the edge of the fabric like this:

Try not to stretch the ribbing as you pin it into place. Here is the backside of my onsie with the pinned ribbing:

And here is the front:

Now sew the ribbing into place. This is the hardest part of the project. Because you are working with stretchy fabric, increase your stitch length to make it easier to sew. You can also use a knit stitch if your machine is able to do that. As often as you need, stop sewing, drop your needle, and lift the foot to rotate and adjust your fabric.

If your fabric slipped and didn't catch everything, feel free to sew along the edge again to be sure everything is secured well. You can also do this if you like the look. If you need to, unpick any sections and resew them so everything is secure.

When sewing ribbing, it tends to stretch a little bit. Just iron the ribbing and it will shrink back into place. Trim the extra thread and any extra ribbing handing off the ends.

Once you have applied the ribbing to the top of the front and the back bodice, your pieces will look like this:

Now lay both pieces (right side up) on the floor. You want the font bodice piece to be below the top bodice piece like this:

Pull the back bodice piece down until it overlaps the shoulder pieces of the front bodice piece. Make sure that the shoulder pieces of the back bodice piece are on top of the shoulders of the front bodice piece. Match up the tick marks you made above and pin into place.

Hold the pieces up and match the edges of the shoulder pieces and finish pinning into place.

It should look like this with all the edges matched up nicely:

Now sew across the shoulder pieces with a 1/4 inch seam. Be sure to back stitch and be careful not to sew over your pins. Clip your extra thread.

Fold your pieces so that the right sides are together. Pin the edges of the front and back bodice pieces together.

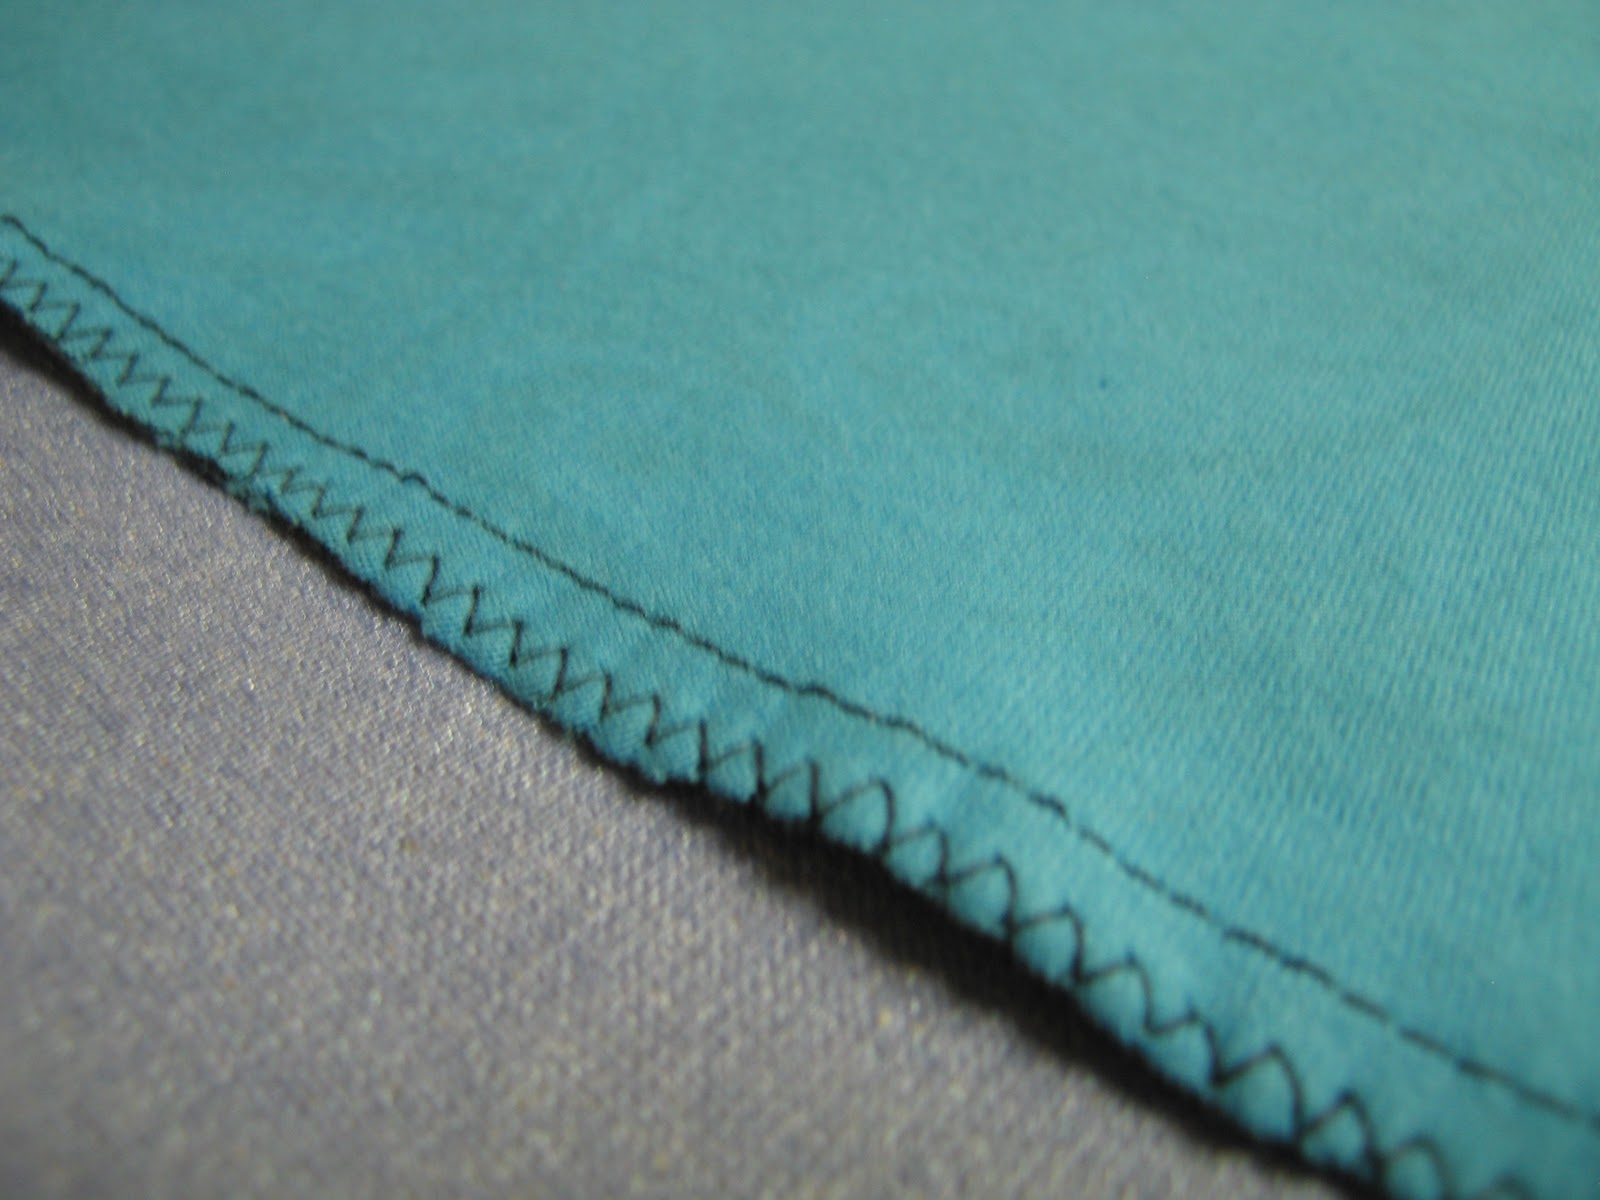
Sew into place using a 1/4 inch seam. Then zigzag or serge the edges:
Flip your onsie right side out and iron the sides. Now we need to attach the thicker ribbing onto
the bottom of the onsie. Start at the edge of the front crotch (leaving a little extra tail just in case) and pin the ribbing. Be careful not to stretch the ribbing as you go.

Do not pin any ribbing to the bottom of the front crotch piece. We will do that in a separate step. Once you are finished, it should look like this:

Now sew on the thicker ribbing the same way to sewed the thinner ribbing. (I forgot to take a picture of the thick ribbing sewed on....SORRY!) Adjust your ribbing as needed. Unpick any parts that didn't quite get attached and resew them. When you are finished, trim the excess ribbing from the crotch piece.
Now take your short piece of ribbing and fold and iron it into place so that the edges are tapered in, like this:

Now fold the tapered edges in:

And fold the whole thing in half. This small piece of ribbing might be a little difficult to handle, but just keep working with it until you get it how you need it.

Pin the small piece of ribbing into place on the bottom edge of the front crotch piece:

And sew across the bottom. Be sure to back stitch. Clip any extra thread.

You are doing good! Now for the sleeves. Pin the bottom of the sleeve about 1/2 inch (depending on how large you want your hem):

Sew across the hem. You can sew it twice if you like the look:

Put right sides together to form the seam. Pin.

Sew using 1/4 inch seam and then zigzag.

Now, turn your onsie inside out and your sleeve right side out. You are going to put your sleeve inside the armhole of the onsie. This allows the right side of the fabric to be together. Make sure that the hem (that you just sewed above) of the sleeve enters the armhole first. You also want to match up the seams on the sleeve and in the armpit of the onsie.

Can you see how my seams are matched up here?

Pin into place. You might want to carefully turn the onsie right side out to be sure you have oriented everything correctly.

Now, sew along the edge using a 1/4 inch seam. Be very careful so you don't catch any other fabric while you are sewing. You also want to make sure that your new stitch is further towards the center of the onsie than your old shoulder stitch. When you are finished, turn the onsie right side out. Check to make sure everything looks good and is secure, and then zigzag around the seam.

Do this with both sleeves. Turn the onsie right side out and iron everything so it lays correctly. Now, go find some snaps at your local craft store and you will be good to go!

Super cute. If I had a sewing machine... oh man do I want one.
ReplyDeleteFound your link on Make It Do comments.
ReplyDeleteThose look great and thank you for the tutorial, your explanations make it seem so easy. Love the fabrics!
Thanks for this great tutorial. I printed out the pattern and some of the instructions came out really blurry. I was wondering if the seam allowance is already included or if I should add it?
ReplyDeleteLove your site btw.
Cindy,
ReplyDeleteThanks for letting me know about the blurry-ness. I will try and post a better picture. In the meantime, if you email me at candidly-kate (at) gmail (dot) com, I can send you the PDF pattern that should print out better. Also, the seam allowance is included in the pattern. Thanks for reading! Feel free to follow me if you feel so inclined!
Hi Kate,
ReplyDeleteThank you for your swift response. I tried e-mailing you several times big gmail keeps on sending me a msg saying that my msg couldn't be delivered. I would love to receive the pattern in pdf. My email is cindysmith032680 (at) gmail (dot) com.
Thanks again your new follower Cindy :-)
I would love to get the PDF pattern emailed to me also. My email is stdozier211@bellsouth.net
ReplyDeleteThanks so much, Teresa
Thanks so much for the pattern! I so wanted to make a camo onsie for a friend, now I can! Just a little tip...An easier way to put in those tiny sleeves would be to sew them on before you sew the side seam. You would then sew the underarm & side seam as one seam.
ReplyDeleteGreat tip Bree!
ReplyDeleteawesome tutorial!! So great! I've pinned this. thanks for linking up to Create LInk Inspire!
ReplyDeleteThese are such a great idea! I never thought to make onesies out of our own clothes. The pictures are perfect for explaining every step. Thanks so much for sharing your tutorial and pattern, your post will be featured in tonight's What'd You Do This Weekend! Pinning :-)
ReplyDeleteAshley @ PioneerMomma.com
awesome tutorial! pinning!
ReplyDeleteThis is a fantastic tutorial and I can't wait to try it! If I were to buy material for it, how much do you think I would need? My second child is due in February and I received a sewing machine for Christmas. :D
ReplyDeleteThank you!
Thank you for the pattern, I've used it in the size it comes and also made a larger version for my 1 year old grand-daughter. However, my first version of this(the 3-6 month version) came out very long and thin, it just goes round my 3 month old grand-daughter but it won't fit her for long. I measured the pattern pieces and they would only allow for about a 38 cm waistline (just over 15") by the time I've taken off 3/8" or a 1cm seam allowance. Luckily I used quite a stretchy knit. The length is also about 40cm which seems quite long for a 3-6 month old. I made it a lot wider but not much longer for the older grand-daughter. For the next one for the 3 month old (now 4 months) I'll need to make it fatter but it can also be quite a bit shorter. Do you think it's just the way it's printing? I'd be interested to know what size yours comes out. Maybe you can put a 1" square (or 2.5cm) on the next version / pattern?
ReplyDeleteHow do I get the pattern? I tried putting it in word & just got gibberish. Thanks
ReplyDeleteI saw your blog on Pinterest for the onesie pattern and noticed in the comments that you were willing to send a PDF of your pattern via email. I'd like to receive a copy of your pattern as well. I love your idea of buying knit shirts on clearance to make the onesies. Excellent idea! I was using t-shirts to make rompers for my new grandson. My email address is thesewladi@gmail.com.
ReplyDeleteI look forward to getting the pattern.
I need pdf pattern my email address yusra.19.ys@gmail.com
DeleteI am just starting to sew and this will be perfect for an upcoming baby shower! Your tutorial is wonderful!! I would love your pattern hollywink1223@yahoo.com Thanks!
ReplyDeleteHi there,
ReplyDeleteI have just started sewing and love your tutorial! Thank you so much for posting. I was wondering if you could please send me the pattern? I would love to make a couple of these for my daughter for xmas, najrbrown@gmail.com
If I could also get the pattern, that would be awesome! My email is courtney(at)paggeot(dot)com
ReplyDeleteReally love this tutorial! I've saved the images but they are a bit blurry. Would you please be able to email the pattern to hollyewatts@hotmail.co.uk. Thanks so much! x
ReplyDeleteI would love this pattern sent to thorntonkim@msn.com. thank you
ReplyDeleteMy daughter wants some onesies for my granddaughter. Your tutorial is phenomenal. I will give it a try after Christmas, next year lol. You have gone into so much detail. Thanks sew much for sharing.
ReplyDeleteHello Kate. Not sure if you are still monitoring this blog, but if you are, I would love the PDF pattern of this onesie please. My daughter-in-law and son are expecting identical twin girls. Thank you. linda.altermatt67@gmail.com
ReplyDeleteI would love a copy of this pattern if its still available. przeklasa@hotmail.com
ReplyDeleteI would love a copy of this pattern if its still available. przkasa@hotmail.com
ReplyDeleteAfyon
ReplyDeleteBalıkesir
Kırklareli
Amasya
Bilecik
DM5İ1
Afyon
ReplyDeleteBalıkesir
Kırklareli
Amasya
Bilecik
8NCVTC
Erzurum
ReplyDeleteistanbul
Ağrı
Malatya
Trabzon
ETF3
whatsapp görüntülü show
ReplyDeleteücretli.show
2N20V
görüntülü.show
ReplyDeletewhatsapp ücretli show
AFGU
edirne evden eve nakliyat
ReplyDeleteadana evden eve nakliyat
rize evden eve nakliyat
niğde evden eve nakliyat
gümüşhane evden eve nakliyat
JJC
https://istanbulolala.biz/
ReplyDeleteP04U8
tekirdağ evden eve nakliyat
ReplyDeletekocaeli evden eve nakliyat
yozgat evden eve nakliyat
osmaniye evden eve nakliyat
amasya evden eve nakliyat
V023GJ
urfa evden eve nakliyat
ReplyDeletemalatya evden eve nakliyat
burdur evden eve nakliyat
kırıkkale evden eve nakliyat
kars evden eve nakliyat
YZ4EES
3F44E
ReplyDeleteBitlis Parça Eşya Taşıma
Manisa Parça Eşya Taşıma
Bilecik Evden Eve Nakliyat
Kars Lojistik
Rize Lojistik
8F505
ReplyDeleteNiğde Lojistik
Ağrı Evden Eve Nakliyat
Samsun Şehirler Arası Nakliyat
Amasya Şehirler Arası Nakliyat
Kars Şehir İçi Nakliyat
Kırşehir Şehirler Arası Nakliyat
Çanakkale Şehir İçi Nakliyat
Elazığ Parça Eşya Taşıma
Kocaeli Şehirler Arası Nakliyat
8D2C8
ReplyDeleteReferans Kimliği Nedir
Giresun Parça Eşya Taşıma
Osmaniye Şehir İçi Nakliyat
Tekirdağ Boya Ustası
Zonguldak Evden Eve Nakliyat
Balıkesir Şehir İçi Nakliyat
Konya Şehirler Arası Nakliyat
Batman Şehirler Arası Nakliyat
Ardahan Lojistik
FBE0B
ReplyDeleteOsmaniye Parça Eşya Taşıma
Etlik Boya Ustası
Bitcoin Kazanma
Nexa Coin Hangi Borsada
Karapürçek Boya Ustası
Çerkezköy Çatı Ustası
Yalova Şehir İçi Nakliyat
Iğdır Lojistik
Kırıkkale Parça Eşya Taşıma
6F21D
ReplyDeleteSinop Şehir İçi Nakliyat
Milyon Coin Hangi Borsada
Tokat Şehir İçi Nakliyat
Kırıkkale Lojistik
Edirne Parça Eşya Taşıma
Ankara Lojistik
Yobit Güvenilir mi
Ünye Organizasyon
Adıyaman Şehir İçi Nakliyat
81316
ReplyDeleteUşak Şehirler Arası Nakliyat
Maraş Şehirler Arası Nakliyat
Bitrue Güvenilir mi
Çerkezköy Oto Boya
Nevşehir Lojistik
Bitci Güvenilir mi
Balıkesir Şehirler Arası Nakliyat
Mardin Evden Eve Nakliyat
Eryaman Boya Ustası
AD88B
ReplyDeleteErzincan Evden Eve Nakliyat
Kastamonu Parça Eşya Taşıma
Batıkent Fayans Ustası
sarms
Zonguldak Şehir İçi Nakliyat
Gölbaşı Parke Ustası
Ordu Parça Eşya Taşıma
Tunceli Parça Eşya Taşıma
Bayburt Lojistik
17675
ReplyDeleteÇerkezköy Buzdolabı Tamircisi
Bitget Güvenilir mi
Niğde Şehir İçi Nakliyat
Batıkent Fayans Ustası
Van Lojistik
Van Şehir İçi Nakliyat
Siirt Lojistik
Çorum Lojistik
Çanakkale Lojistik
DB930
ReplyDeleteAmasya Şehirler Arası Nakliyat
Çerkezköy Ekspertiz
Binance Referans Kodu
Mardin Şehirler Arası Nakliyat
Osmaniye Parça Eşya Taşıma
Yenimahalle Fayans Ustası
Düzce Lojistik
Amasya Parça Eşya Taşıma
Bingöl Şehirler Arası Nakliyat
89E86
ReplyDeleteNiğde Lojistik
buy masteron
Çerkezköy Boya Ustası
Bursa Şehir İçi Nakliyat
Kars Şehir İçi Nakliyat
Düzce Evden Eve Nakliyat
Tunceli Şehir İçi Nakliyat
Paribu Güvenilir mi
Mersin Parça Eşya Taşıma
C4350
ReplyDeletePeriscope Beğeni Hilesi
Kripto Para Çıkarma
Görüntülü Sohbet
Kripto Para Kazma Siteleri
Telegram Abone Hilesi
Parasız Görüntülü Sohbet
Jns Coin Hangi Borsada
Threads Takipçi Hilesi
Bitcoin Nasıl Üretilir
9C5A4
ReplyDeletepancakeswap
layerzero
dextools
dappradar
eigenlayer
roninchain
ledger wallet
poocoin
arbitrum
DE62E
ReplyDeletekaldıraç nasıl yapılır
4g proxy
okex
paribu
kucoin
kucoin
binance
aax
papaya meyvesi
3A1D6
ReplyDeletereferans kodu binance
kızlarla canlı sohbet
bitmex
kripto kanalları telegram
mexc
cointiger
btcturk
bingx
bitcoin ne zaman yükselir
F7566
ReplyDeleteTwitter Takipçi Satın Al
Bitcoin Yorum
Yapay Zeka
güneş paneli
sunucu kiralama
Youtube Para Kazanma
SEO Danışmanı
jeneratör fiyatları
istanbul iç mimar
26AF9
ReplyDeleteYoutube Kanal
Etsy SEO
Telegram Reklam Verme
Telegram Kanal Satın Al
Silkroad Sunucu Kiralama
güneş paneli
Trendyol SEO
vds
Fiziksel Sunucu Kiralama
12891
ReplyDeletefuar standı
dedicated server
Vds
Youtube SEO
güneş paneli
Instagram Para Kazanma
fuar standı
Silkroad Proxy
IPv6 Proxy Satın Al
FFF7B
ReplyDeleteInstagram Beğeni Satın Al
Mobil Uygulama Yapma
Sosyal Medya Yönetimi
offshore hosting
iOS Uygulama Yapma
Silkroad Pvp Serverler
Google SEO
Google Harita & İşletme Kaydı
Instagram Takipçi Satın Al
3B3D7
ReplyDeleteHosting Satın Al
Knight Online Proxy Satın Al
Android Uygulama Yapma
dizi önerileri
pvp
seo eğitimi
Twitter Reklam Verme
seo danışmanı
yabancı dizi önerileri
C7293
ReplyDeleteProm Coin Yorum
Bitcoin Forum
Mana Coin Yorum
Vite Coin Yorum
Knc Coin Yorum
Kava Coin Yorum
Ankr Coin Yorum
Yfi Coin Yorum
Bitcoin Son Dakika Haberleri
0ED13
ReplyDeleteBitcoin Yorum
Nmr Coin Yorum
Coti Coin Yorum
Xlm Coin Yorum
Tfuel Coin Yorum
Mxc Coin Yorum
Slp Coin Yorum
Ont Coin Yorum
Dia Coin Yorum
fgthbyghnj
ReplyDeleteاصلاح الافران بجدة
شركة كشف تسربات المياه بالهفوف
ReplyDeleteكشف تسربات المياه بالاحساء
FGNJHCGYNJ
ReplyDeleteشركة تنظيف بالاحساء
dfcnmfhjhjhjhjj
ReplyDeleteشركة مكافحة حشرات بالاحساء
شركة تنظيف افران u6baHBGnED
ReplyDeleteشركة مكافحة حشرات بالجبيل bYDR36a51K
ReplyDeleteشركة مكافحة حشرات بالجبيل r1Et73DqkZ
ReplyDeleteشركة مكافحة النمل الابيض بالجبيل xCam9gs23w
ReplyDeleteشركة تسليك مجاري بالجبيل cAovZBZpEU
ReplyDelete2077AE532B
ReplyDeletetürk aktif takipçi
A0B7B65B79
ReplyDeleteturk takipci
B5A2B4A31D
ReplyDeletebayan takipci satin al
CDC271E7D2
ReplyDeletebayan takipçi instagram
beğeni satın al
türk takipçi
kaliteli takipçi
ig takipçi
7ECD29F33E
ReplyDeletetiktok ucuz takipçi
beğeni satın al
tiktok takipçi
telafili takipçi
takipçi paketi